SSL/TLS is awesome right? For most things definitely! But maybe not so much when it comes to network forensics! Especially given that the data we want to access in order to assess business impact isn’t accessible to us! We aren’t saying we want to snoop on people, but when things have gone bad visibility is our best friend! That’s because as Incident Responders we often find ourselves deep inside packet analysers trying to understand the methods the attackers are using, identify any malware C2s, and detect lateral movement across the target network.
This is why the SNI is our friend!
We’ll start this blog post by giving a brief explanation of what the SNI is, why it is used and then move onto how you can use it to aid your investigations using free and open source tools. This blog post doesn’t dive into SSL and the 6 stage handshake. It requires you to already have a base understanding of this (and if you don’t you should at least know that everything after the certificate exchange is encrypted).
What, why and how?
SNI stands for server name indication (or Indicator depending on who you ask). Take into consideration the following scenario. Let’s say we have a single webserver that hosts two websites; site 1: https://www.achromatic-security.com & site 2: https://development.achromatic-security.com.
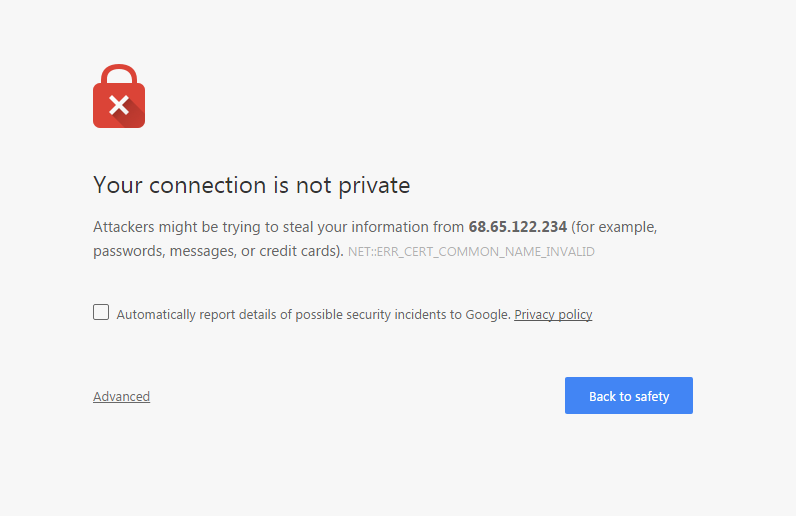
Both these sites are served up over a secure connection (HTTPs) at the same location; let’s use the ipv4 address 68.65.122.234 for this example; when a visitor makes a request to our site using SSL, the first thing the server and client must do is establish a trusted connection. This trust is established by checking that the certificate details are all above board (expiry date, allowed uses etc), that it has been issued by a trusted authority, and crucially (in this case) that the common name of the certificate matches the hostname that the browser has requested. If everything checks out, you are good to go! However, if one of those things doesn’t don’t match you get one of these:

Before we dig any deeper, let’s talk a little bit about virtual hosts. Basically, a virtual host allows a single web server to act differently depending on certain conditions. For example, our server may have the following folders:
- /var/www/achromatic-security_com
- /var/www/development_achromatic-security_com
- /var/www/default
Providing our virtual host files are in good shape and configured properly, when an HTTP request is sent to our server, Apache will look at the Host parameter in the header, check its virtual host files to see if any of the rules match, and then act accordingly. In the case above, this could be serving files from a certain directory, but it also extends to much more (see our upcoming write-up on securing your LAMP stack like a boss).
The key in HTTP virtual host functionality is the Host header however in the case of HTTPS we have a problem! This header is sent AFTER the certificate exchange takes place, in which case how can a server hosting multiple websites know which certificate to send?
The chicken and the egg are real!
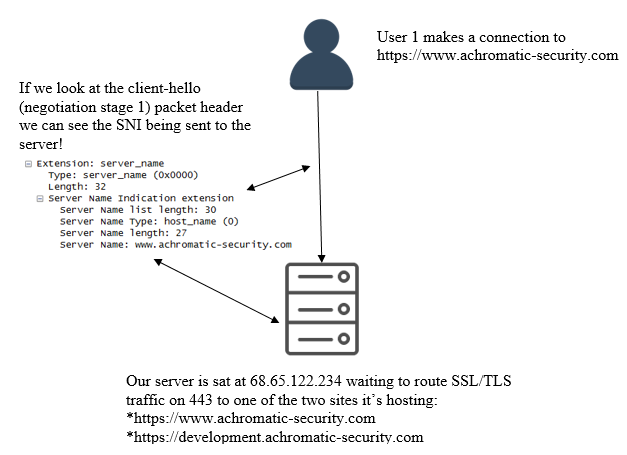
This is where the SNI comes in. When we make a secure connection to https://www.achromatic-security.com the SNI in the first part of the handshake tells the server which host we are attempting to connect to (In clear). The server then responds with the appropriate certificate for that host and the SSL/TLS handshake takes place. Once everything is deemed legitimate, we have a successful connection to that host. Awesome! Check the diagram out below that explains how SNIs are used in simple terms (note this diagram skips the DNS lookup phase).

In later blog posts we will show how you can use SNIs to aid in your investigations when performing both static and behavioural analysis. For now we are just going to show you how you can retrieve this information and use the simple POC developed by the Achromatic Security team to extract this information automatically.
First load Wireshark (https://www.wireshark.org) and sniff on your external interface, ours is wlan0 for this example. Then apply the following filter and hit enter: ssl.handshake.type == 1. This will allow us to focus on the first stage of the SSL/TLS negotiation (the client-hello). You should have an output similar to the one below with the obvious differences in dates, IP addresses etc.

Now navigate to a website of your choice that uses SSL/TLS, and then click on the first packet within Wireshark. This will open the packet information and we can try and find that SNI!
Once you have done this expand the secure sockets layer and Handshake protocol: Client Hello section. Expand “extension: server_name” and you will see the the server name indication (SNI) section, which will look similar to the one shown below:

You can use a variety of different protocol analysers to view the SNI manually. However, we have created a small script which passively listens on a specified interface and extracts where possible the SNI from SSL/TLS negotiations. You can download this script from the Resources->Tools & More section of this site: https://www.achromatic-security.com/tools-and-more which contains a link to our GitHub page.
In later blog posts we will demonstrate SNIs effectiveness during investigations and how you can use this information alongside other analysis techniques to perform effective network forensics allowing you to identify C2s and assess the business impact.

